December 26, 2011

Nursery Progress

Over the weekend we officially started on the nursery.  When I say we I really mean my husband.  I had nothing to do with it.  He painted the entire room all by himself!  I tried to help but he told me to just rest.  Isn't he the best?! 

We (and this time I do mean we) picked out this paint color from Benjamin Moore.  Even though I love how smooth Benjamin Moore paint goes on we decided to go the less expensive route and have Home Depot color match it.
 
The color is from their Historical Collection and it is called Alexandria Beige. 

Once again he used the beloved Frog Tape.  Best thing since sliced bread. I totally thought I took a before picture but I sure can't find it on my computer anywhere!


The color in this photo makes it look quite a bit darker than what it really is.  I should probably change the settings on my camera, oh well such is life.
Operation assemble the crib is next!

December 17, 2011

Small Update

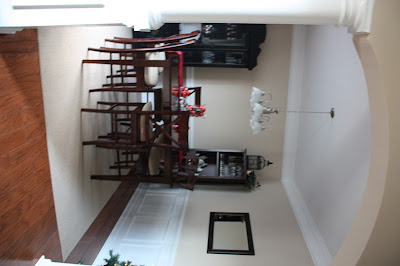
When we moved into our house one of the first rooms to be furnished was the dining room.  We already had the table (Craigslist, the wine tower (Bed, Bath, & Beyond clearance), and curtains (Ross), what more did we need?  We also added the china cabinet but the room was still missing something.  A rug!

Enter: Garden Ridge.  We found this rug for a steal there.  Of course it did come with a little bit of labor.  By labor I mean me sitting on a pallette while Hubs man handled all the rugs until we found the "perfect" one, which just so happened to be the very last one buried under about 25ish others.

Since adding the rug to the room we have decided the walls need to be painted.  We want to keep it neutral so we're not locked into a certain color scheme so we're thinking just a darker beige of some sort.


December 16, 2011

I GIVE UP!

As I've mentioned before I had an idea to make a collage of mirrors in our upstairs guest bathroom.  I had 2 mirrors that I had got at a yard sale and Salvation Army that I spray painted and was ready to hang.  I felt silly just hanging 2 mirrors so I patiently waited until I found at least a 3rd mirror.  Mrs. DeVore swooped in and saved the day once again.  Her mom actually found a small mirror that is perfect!  FINALLY, I could hang the mirrors.  I did and it looked amazing.  The camera was downstairs and I was upstairs so I kind of didn't get a picture of it.  This is really super stinky because the next day one of the mirrors was busted on the floor.  Luckily for me (and the next 7 years of my life) it was just the frame that shattered and not the mirror.  Whew, crisis kind of averted.

Once again I'm stuck with only 2 mirrors, back to square 1.

Fast forward about a week when I stumbled upon an estate sale.  I found this mirror and a matching one for a few bucks.  I though I would try my hand at "Rub 'n Buff" so I bought some at Hobby Lobby (it's in the craft/glue section).  The directions say to put it directly on your finger and rub it on the item.  Since I'm pregnant and all I was thinking this might not be the best idea considering you would have to wash it off your finger with paint thinner.  I figure I probably expose myself (and this baby) to more paint/paint thinner/ hair color/ etc. than I probably should in the first place so I wore a rubber cleaning glove during the process.  I'm not quite sure if that's why it didn't turn out as I would hope or not. 


FINALLY, 3 mirrors again, time to hang this one.  As I was hammering in the nail to hang it, CRASH, the round mirror fell and shattered.  Once again though, just the frame broke and not the mirror, whew.  I was still super upset because I bought that mirror at a yard sale of a hoarder for $1 and I thought that was a cool story, bro.  After I threw my hissy fit about it by myself and my sweet husband came upstairs to check on me.  I figured out that I could glue it all back together but I would just have to spray paint it, AGAIN.

These are the 2 mirrors pre-busted up. Isn't it ironic that I have a pic of the 2 mirrors that fell and broke?  It's almost like they knew it was going to happen.  It was fate.

Throughout this whole process I realized that I didn't even like the mirrors on that wall in the bathroom and decided to hang them over the throne instead.  I went ahead and hung the 2 mirrors and then decided I really need to go ahead and glue the round one back together.  IT WORKED!!!  I have not spray painted it because well, if it's going to fall right back off the wall I don't want to waste time and money spray painting it.  So far it has been hanging up for a few days so it looks like I will be spraying it after all.
I also finally bought a towel bar and toliet paper holder.  The only thing really left for this bathroom is a new large mirror for over the sink.  It's kind of an odd measurement though so that might take a while. 


 The long rectagle mirror is the one I used Rub 'n Buff on.
Sorry for allt he shadows.  I was trying to get pictures taken before I left for work and was rushing!

December 15, 2011

How SILVER are your branches...

This was by far one of the easiest decoration projects I have done in my entire life.  I went out to our backyard and cut some small branches off of some trees and laid them out on an old shower curtain in the yard.  I then used some silver spray paint I had in the garage and spray painted the branches.  After the first side dried I flipped them over and did the same to the other side.  I had originally planned to use them in my dining room centerpiece but I didn't like that you wouldn't be able to carry on a conversation.  They sat in the garage for about a week and then WHAM it hit me.  I had a silver pot in the garage that I wasn't using so I just shoved them in there and bought some white glittery snowflakes from Target (4 pack for $1) and hung them from a few of the branches.

Sorry, I didn't exactly take a before picture of the branches but I think it's safe to say we all know what tree branches look like.


Linking up:


The DIY Show Off

December 14, 2011

Powder Room Makeover

I think it's quite comical that the first rooms to get completed in our new house is the bathrooms.  I guess I do my best thinking there. 

For the powder room the hubs and I decided to go with a deep red.  We decided on Benjamin Moore's "currant red".


I did not use a primer, just did 2 coats of this paint.  I also used Frog Tape for the first time and LOVED it!  I was so sick and tired of the crappy blue painters tape.  There is nothing I hate more than having to go back and do touch ups because the tape failed to do it's job. 

Here is a shot of it before:


Have you ever tried to take a picture of a tiny powder room? Can we say difficult?
Here are some pictures of the bathroom completed (for now).  We are thinking of getting a small black shelf to go over the throne but this will do for now.

You can't really tell from this picture but the dark red paint really makes the ceilings look super tall and the crown molding just pop!


Learn a bit more about this mirror re-do.  The towel ring was actually a garage sale find for $2!

 
The Christmas decorations will be replaced with something else in January of course.  The tissue box cover was actually an unfinished wood one from Hobby Lobby that I primed and spray painted black.  On my wish list is a mirrored tissue box cover but they are EXPENSIVE and I haven't quite figured out how to make my own yet.  This will do for now.

Here's a view from the inside of the bathroom just to show you the painted doors
And nice and red just in time for Christmas!


Here's the to do list:
- paint bathroom red
- paint accent accesories black
- buy new soap dispenser
- buy new hand towels
-maybe- shelf for over potty

December 13, 2011

Mirror Mirror on the Wall

I found this mirror at Goodwill and hoped and prayed it would fit in one of the bathrooms. 


It did!!! it did!!!!

It fit in our downstairs powder room.  If you know me, you know I'm not much of a fan of gold in everyday decoarting.  I decided to spray paint it black with some accents of silver.  I taped off the mirror and sprayed away.  The tape was covering up some of the gold part and I had to redo it.  Awesome.  Turns out I didn't like the "silver accents" so I ended up re-painting the entire thing black anyways. 


Stay tuned for the full bathroom reveal!

December 10, 2011

How Lovely Are Your Branches

I found this Christmas tree years ago after Christmas on sale for about $60.  Not too shabby for a 7.5 footer!  I wanted our tree to look a little more mature this year so we decided to go with silver, white, red, and green.  We already had ornaments that would go with the color scheme so we didn't have to buy any new ones.  I am a sucker for glittery ornaments though!  I think I'm part raccoon when it comes to shiney objects!  We did end up buying thick silver mesh ribbon (K-Mart) to wrap around the tree and a couple packs of the glittery swirly stick things (Garden Ridge)...what the heck is the proper name for those anyways?!

The hubs did an AMAZING job setting up the tree and fanning out the branches.  That part makes me itchy!  Then we did the dreaded task of putting the lights on.  My favorite is still pulling each ornament out of the box and remembering who bought it/


Have you ever realized how hard it is to take a good looking picture of a tree?  If you have any tips feel free to send them my way!

Here are some more of the handmade ornaments that are for sale.


December 09, 2011

Cheap Centerpiece Idea

With the help of blogs and Pinterest you can find cheap centerpiece ideas just about anywhere these days.  Here is my take on it using what I already had laying around the house.


I had all the ornaments and wreath picks (the greenery) left over from clearence sales that I bought in years past.  The glassware was actually used for our wedding for centerpices.  I bought the table runner last year at Ross.  The only thing I really "crafted" was the pine cones.  I found them all in the back yard and took some "white snow paint"  and just brushed it on the tips. 

I was really hoping to use some sticks I spray painted a sparkly silver in the center vase but after I put them in decided against it because it would be quite difficult to hold a conversation with someone across the table while peering through a silver forest!


Total cost: FREE

Linking up:
The DIY Show Off

December 08, 2011

Southern Christmas Show

If you live in the Charlotte area you know I'm a little behind on this post considering the Southern Christmas Show was before Thanksgiving.  Regardless...it's a tradition for my sis and I to go to the Southern Christmas Show together every year.  We love that it really gets us in the mood for Christmas and gives us some great decorating ideas. 


...purple goodness

...leopard goodness

...cookie goodness

Rice Krispie treat turkey goodness...yes you read that right, a rice krispie treat shaped like a turkey. 

December 07, 2011

Oh Christmas Tree

Since this is our first Christmas in our new house it was a little stressful when it came to decorating for Christmas this year.  After I got up all the decorations I realized there wasn't a single Christmas item in our dining room.  We can't have that now can we?  So I was able to talk the hubs into letting me buy a small skinny tree to go in the corner of the room to help cheer it up a bit.  I found a 4 ft slim tree at Wally World but there wasn't a sign on it.  There was a UPC taped to it with a hand written $20.  I had the kind folks there find the box that matched the tree and went to check out.  Low and behold it rang up $25, not cool, I told Hubs I'd keep the entire mini tree budget under $40.  I told the cashier and we both walked over to the display together.  Sure enough she took the $5 off!  Whew!  I also pick up 2 gold poinsettia clips for 97 cents each while I was there.

When I got home I opened the box and it was super easy to put together.  I was not a fan at how short the tree really was so I ended up cleaning out a big urn I had in the back yard, priming (had), and spray painting it with some ORB (oil rubbed bronze) spray paint ($6-Hobby Lobby).  I had some issues getting the base of the tree to fit and ended up having to remove the legs.  Then I kind of rigged it with some leftover styrafoam I had out in the garage. 

I found some sparkly burgandy remnant fabric (50 cents) at my local fabric store along with 12ft of white and sparkly gold ribbon ($2.50). 

I had some left over wreath picks and gold ornaments that I bought on clearence after Christmas last year (we'll say free since I didn't spend $$ this year on them) and I also wanted to put my new leopard ornaments to use! 


(with flash)

Total cost
Tree: $20
Poinsettia clips: $2
Ribbon: $2.50
Gold sparkly swirl picks: $2
ORB spray paint: $6
"Tree skirt":  50 cents
Leopard ornaments: roughly $3 (taking into account supplies used)

...drum roll please...
$36!

Yay for coming in under budget...$4 left...do I see a Starbucks in my future?  j/k Hubs ;)


December 06, 2011

Leopard Christmas

If you know me you know I love all things animal print.  I have ever since I was about middle school age.  If it didn't look so "Real Housewives of New Jersey" to decorate my entire house in it I probably would (thank you Real Housewives for showing me the error of my ways).  I wanted to infuse some leopard love into my Christmas decor this year in a tasteful way.  Low and behold...leopard ornaments! 

I searched high and low for leopard print tissue paper but couldn't find it in a local store and it was pretty pricey to order it online, so I gave up on the tissue paper and went to my local fabric store and bought half a yard of leopard fabric. 

I ended up using some old beat up colored ornaments I had saved for a craft one day.  I modge podged the entire ornament and used strips of the fabric and just continued to modge podge it on with a foam brush.  Has modge podge become a verb yet? 

I set them up in an empty egg carton to dry over night and the next day I used a paint brush and some gold glitter paint to add a little sparkle. 


I had a ton of fabric left over so this ended up being a super cheap project!

Linking up:

The DIY Show Off

December 02, 2011

Rock-n-Roll Christmas

I was able to mark something off my bucket list this week!  Even though the house is a disaster and there is decorations and wrapping paper everywhere I will feel accomplished because marking something off the bucket list is huge!

As a Christmas gift to ourselves the hubs and I decided to go see the Trans-Siberian Orchestra this year!  They were nothing short of AMAZING!!!


Super blurry (had to use the small camera) but just to show how close we were to them!


                            Yes!  That is fire everywhere!  It made this pregnant lady sweat!