Showing posts with label spray paint. Show all posts

May 10, 2012

Coffee Table

I found this coffee table on my lunch break one day at good ol' Goodwill.  It was only $10! 


One edge was busted up pretty good but nothing I couldn't fix.


The first thing I did was heavily apply wood filler to that spot to make it flush with the rest of the side.  Then I used spray primer on the entire piece and then it sat in my garage for a few months.  Whoops.  What can I say? I was very pregnant then.

Fast forward those few months....I spray painted the entire piece with American Accents Heirloom White. 


I didn't like the coverage I was getting on the top of the piece though so I rolled 2 coats of white paint on and then once that dried went back again with 2 more coats of the spray paint. Kind of goofy I know but nothing was covering the way I wanted it to.

I actually finished this piece back in January but I never got around to taking a picture of it until today!  Lazy or busy...you decide ;)


This is the corner that was all banged up...not banged up anymore.


I might do a dark brown glaze on the sides but for now this is how it's staying.


February 18, 2012

Goodwill Candle Holders

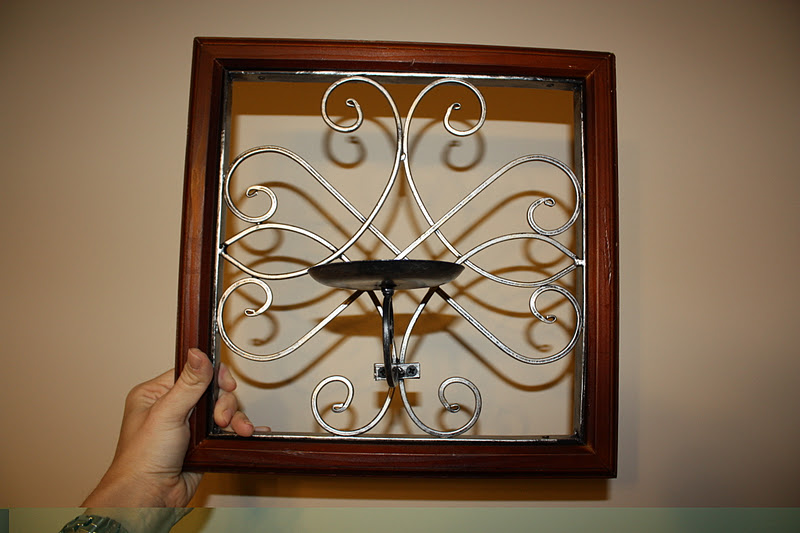
On one of my most recent Goodwill trips I found a set of these wall mount candle holders.  The frame is wood and was pretty beat up.  The picture helps hide all the flaws. 


When I bought them I wasn't sure if they would end up in my house or The Depot.  I used Frog Tape and taped off around the inside edges so I wouldn't get paint on the silver iron parts.  I lightly sprayed on some primer and then used a satin black spray paint on top.  I had to be very careful not to get the overspray on the silver parts though.  It took about 10 minutes for the whole thing, with taping being the worst part.

Oh, looky there.  They found themselves a home in my home! 


We found the round candles at Garden Ridge for $2 a piece!

January 25, 2012

Nursery Lamp

The nursery is moving right along.  We have hit our fair share of bumps in the road while redoing it but, hey, that's something that comes with DIY projects and not paying full retail for items!

I had this lamp that I bought years ago from Wal-Mart.


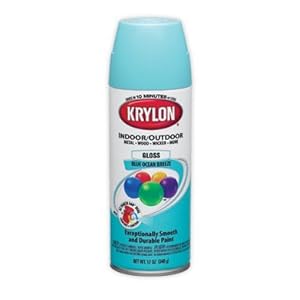
Since the wall color is very neutral I wanted to pep the room up with some pops of color.  Enter Krylon's Blue Ocean Breeze.


I removed the shade and taped off around where the light bulb goes.  Then I used my spray primer and let it dry.  Next I went to town with the spray paint.  I did have a few drip marks when I went back to check on it so I just sanded them out and resprayed those places.


January 19, 2012

IKEA Spice Racks turned Bookshelves

I know we've been seeing this idea floating around all over Pinterest and other blogs.  I first saw it on Daily Garnish's blog.  I thought it was such a super cute idea.  I didn't really want to put it on a dresser or the changing table so I decided on hanging them from the wall.  There is a small strip of wall next to the closet that would work perfectly!

We bought the spice racks at IKEA for $3.99 each.

BEKVÄM Spice rack, birch Width: 15 3/4 " Depth: 3 7/8 " Height: 3 1/2 "  Width: 40 cm Depth: 10 cm Height: 9 cm
Then I primed them, let it dry, and spray painted them a gloss white.  I did 2 coats because I figure kids are rough on things and I rather do it now than later!

From here I told Hubs where I wanted them hung and he went to town with the rest. 

Here's what they look like now. 

Sorry for the grainy iPod picture.  I'll take a better one for the entire room reveal.

December 16, 2011

I GIVE UP!

As I've mentioned before I had an idea to make a collage of mirrors in our upstairs guest bathroom.  I had 2 mirrors that I had got at a yard sale and Salvation Army that I spray painted and was ready to hang.  I felt silly just hanging 2 mirrors so I patiently waited until I found at least a 3rd mirror.  Mrs. DeVore swooped in and saved the day once again.  Her mom actually found a small mirror that is perfect!  FINALLY, I could hang the mirrors.  I did and it looked amazing.  The camera was downstairs and I was upstairs so I kind of didn't get a picture of it.  This is really super stinky because the next day one of the mirrors was busted on the floor.  Luckily for me (and the next 7 years of my life) it was just the frame that shattered and not the mirror.  Whew, crisis kind of averted.

Once again I'm stuck with only 2 mirrors, back to square 1.

Fast forward about a week when I stumbled upon an estate sale.  I found this mirror and a matching one for a few bucks.  I though I would try my hand at "Rub 'n Buff" so I bought some at Hobby Lobby (it's in the craft/glue section).  The directions say to put it directly on your finger and rub it on the item.  Since I'm pregnant and all I was thinking this might not be the best idea considering you would have to wash it off your finger with paint thinner.  I figure I probably expose myself (and this baby) to more paint/paint thinner/ hair color/ etc. than I probably should in the first place so I wore a rubber cleaning glove during the process.  I'm not quite sure if that's why it didn't turn out as I would hope or not. 


FINALLY, 3 mirrors again, time to hang this one.  As I was hammering in the nail to hang it, CRASH, the round mirror fell and shattered.  Once again though, just the frame broke and not the mirror, whew.  I was still super upset because I bought that mirror at a yard sale of a hoarder for $1 and I thought that was a cool story, bro.  After I threw my hissy fit about it by myself and my sweet husband came upstairs to check on me.  I figured out that I could glue it all back together but I would just have to spray paint it, AGAIN.

These are the 2 mirrors pre-busted up. Isn't it ironic that I have a pic of the 2 mirrors that fell and broke?  It's almost like they knew it was going to happen.  It was fate.

Throughout this whole process I realized that I didn't even like the mirrors on that wall in the bathroom and decided to hang them over the throne instead.  I went ahead and hung the 2 mirrors and then decided I really need to go ahead and glue the round one back together.  IT WORKED!!!  I have not spray painted it because well, if it's going to fall right back off the wall I don't want to waste time and money spray painting it.  So far it has been hanging up for a few days so it looks like I will be spraying it after all.
I also finally bought a towel bar and toliet paper holder.  The only thing really left for this bathroom is a new large mirror for over the sink.  It's kind of an odd measurement though so that might take a while. 


 The long rectagle mirror is the one I used Rub 'n Buff on.
Sorry for allt he shadows.  I was trying to get pictures taken before I left for work and was rushing!

December 15, 2011

How SILVER are your branches...

This was by far one of the easiest decoration projects I have done in my entire life.  I went out to our backyard and cut some small branches off of some trees and laid them out on an old shower curtain in the yard.  I then used some silver spray paint I had in the garage and spray painted the branches.  After the first side dried I flipped them over and did the same to the other side.  I had originally planned to use them in my dining room centerpiece but I didn't like that you wouldn't be able to carry on a conversation.  They sat in the garage for about a week and then WHAM it hit me.  I had a silver pot in the garage that I wasn't using so I just shoved them in there and bought some white glittery snowflakes from Target (4 pack for $1) and hung them from a few of the branches.

Sorry, I didn't exactly take a before picture of the branches but I think it's safe to say we all know what tree branches look like.


Linking up:


The DIY Show Off

December 14, 2011

Powder Room Makeover

I think it's quite comical that the first rooms to get completed in our new house is the bathrooms.  I guess I do my best thinking there. 

For the powder room the hubs and I decided to go with a deep red.  We decided on Benjamin Moore's "currant red".


I did not use a primer, just did 2 coats of this paint.  I also used Frog Tape for the first time and LOVED it!  I was so sick and tired of the crappy blue painters tape.  There is nothing I hate more than having to go back and do touch ups because the tape failed to do it's job. 

Here is a shot of it before:


Have you ever tried to take a picture of a tiny powder room? Can we say difficult?
Here are some pictures of the bathroom completed (for now).  We are thinking of getting a small black shelf to go over the throne but this will do for now.

You can't really tell from this picture but the dark red paint really makes the ceilings look super tall and the crown molding just pop!


Learn a bit more about this mirror re-do.  The towel ring was actually a garage sale find for $2!

 
The Christmas decorations will be replaced with something else in January of course.  The tissue box cover was actually an unfinished wood one from Hobby Lobby that I primed and spray painted black.  On my wish list is a mirrored tissue box cover but they are EXPENSIVE and I haven't quite figured out how to make my own yet.  This will do for now.

Here's a view from the inside of the bathroom just to show you the painted doors
And nice and red just in time for Christmas!


Here's the to do list:
- paint bathroom red
- paint accent accesories black
- buy new soap dispenser
- buy new hand towels
-maybe- shelf for over potty

December 13, 2011

Mirror Mirror on the Wall

I found this mirror at Goodwill and hoped and prayed it would fit in one of the bathrooms. 


It did!!! it did!!!!

It fit in our downstairs powder room.  If you know me, you know I'm not much of a fan of gold in everyday decoarting.  I decided to spray paint it black with some accents of silver.  I taped off the mirror and sprayed away.  The tape was covering up some of the gold part and I had to redo it.  Awesome.  Turns out I didn't like the "silver accents" so I ended up re-painting the entire thing black anyways. 


Stay tuned for the full bathroom reveal!

December 07, 2011

Oh Christmas Tree

Since this is our first Christmas in our new house it was a little stressful when it came to decorating for Christmas this year.  After I got up all the decorations I realized there wasn't a single Christmas item in our dining room.  We can't have that now can we?  So I was able to talk the hubs into letting me buy a small skinny tree to go in the corner of the room to help cheer it up a bit.  I found a 4 ft slim tree at Wally World but there wasn't a sign on it.  There was a UPC taped to it with a hand written $20.  I had the kind folks there find the box that matched the tree and went to check out.  Low and behold it rang up $25, not cool, I told Hubs I'd keep the entire mini tree budget under $40.  I told the cashier and we both walked over to the display together.  Sure enough she took the $5 off!  Whew!  I also pick up 2 gold poinsettia clips for 97 cents each while I was there.

When I got home I opened the box and it was super easy to put together.  I was not a fan at how short the tree really was so I ended up cleaning out a big urn I had in the back yard, priming (had), and spray painting it with some ORB (oil rubbed bronze) spray paint ($6-Hobby Lobby).  I had some issues getting the base of the tree to fit and ended up having to remove the legs.  Then I kind of rigged it with some leftover styrafoam I had out in the garage. 

I found some sparkly burgandy remnant fabric (50 cents) at my local fabric store along with 12ft of white and sparkly gold ribbon ($2.50). 

I had some left over wreath picks and gold ornaments that I bought on clearence after Christmas last year (we'll say free since I didn't spend $$ this year on them) and I also wanted to put my new leopard ornaments to use! 


(with flash)

Total cost
Tree: $20
Poinsettia clips: $2
Ribbon: $2.50
Gold sparkly swirl picks: $2
ORB spray paint: $6
"Tree skirt":  50 cents
Leopard ornaments: roughly $3 (taking into account supplies used)

...drum roll please...
$36!

Yay for coming in under budget...$4 left...do I see a Starbucks in my future?  j/k Hubs ;)


October 27, 2011

Take a Seat

This chair is super similar to the last chair I redid.  Different bones, same fabric.  I just can't get enough of this fabric!  Here is the chair I started out with that I found at a thrift store going out of business...does it get any better than that?  I mean sure, sad they're going out of business but makes for a decent thrifting day for yours truely.


ewwy.


I did some light sanding, priming, and spray painting and that sealed the deal for the chair part.  Next was ripping off all that nasty fabric and putting on the brand new fabric.  I think I like doing that part best because I can be inside and have the tv on...(and my true laziness shines through).


September 12, 2011

White is the new Gold...

...probably not but I didn't know what else to title this other than "spray paint some ugly crap to make it look better" but that just didn't have much of a ring to it.

I found these gold items at my local Salvation Army.  I hit them up on my lunch break every now and then (about twice a week to be exact).


A little spray paint always makes things better!

(don't hate me, these were gold too but yours truly forgot to take before photos)


August 31, 2011

Blue Shelf

I have got to think of some more creative titles. 

This is a shelf I scored at my local Salvation Army.

Please Please Please ignore all the crap in the background.  This is what happens to your garage when you become a thrifter.  DO NOT (I repeat) DO NOT let your husband see this picture if you want to start thrifting.  This is not the way to get him on board with it.

I primed it with some good ol' Zinser spray primer and then spray painted it with Krylon's Global Blue.


It took 2 coats and covered quite nicely.


I think it would be perfect in a boy's room or as an accent piece for a pop of color.  For now it is living in the booth because I don't have a boy's room.