October 08, 2012

More Burp Cloths!

So I've done a little bit more sewing.  I was contacted by a friend whom I gave my first and last round of burp cloths.  There was a lady at her shower who loved the burp cloths I made her and she was going to be attending another shower and wanted to give some as a gift.  Did that make any sense?  It does in my head, moving on...so I figured up a price and headed to my local fabric store.  She told me she wanted 6 of them so I wanted to get some coordinating fabrics to make it look like a set.  Holy Cow.  So many decisions and I of course wanted them to be perfect.  After combing the store for a solid 20 minutes I stumbled upon pre-cut 5 packs of fat quarters.  THE FABRIC COORDINATED!!!  Problem almost solved...I just need to find one more fabric. That's when I came across this super cute owl fabric.


Luckily the fabric I bought matched ribbon I already had at home.  Score.  Here they all are!  I even had fabric left over.  I'm seeing some of these being made for my baby very soon!  Maybe even a bib or 2?  Tutorial to come soon for those!


October 05, 2012

Coffe Table Revisited

Remember this coffee table I redid a while back?  It seemed like it was missing something.  Since I just made glaze for the armoire I figure I would slap some of the extra on the coffee table. 


 I just took the glaze and wiped it on with a foam brush and then gently wiped it off with a damp paper towel.  Sometimes you might have to add a little more glaze to the deep areas where you want it to show up.


I was able to complete this little update during  one nap time.  I left it out in the garage until the next day to make sure it was all the way dry.


Next up for this room will be some homemade curtains and thick wall stripes!!!  Stay tuned for that!

October 04, 2012

Stairway Gallery Wall

So while our sweet baby was off in dreamland I decided to get my rear in gear and start on our stairway gallery wall.  

  Booooring before.

I've been collecting things for it for a while now and was just always nervous to put it on the wall.  Do I make them all the same color?  Do I make them 2 different colors?  Do I just let them be?  Do I just do pictures? Do I include a few quotes?  Do you see the dilemma?

So on our dear Pinterest it shows you how to cut out paper the size of your frames and tape them on the wall.  Bleh...who has time for that!?  Not I!  Here is my method...

  
Lay them out on the floor and guess!  Grab your hammer and nails and have at it.  I only have 3 unnecessary holes in the wall and it will take me less time to patch those than tracing and cutting out paper! 

Here's what it looks like so far.  I'm still debating whether or not to make the frames all one color or just leave them alone.  I have 2 small things to hang in that weird blank spot above the bird but I can't find the right nails in my supply so I'm waiting on hubs to help.  I am probably going to cover the bird canvas with fabric too.


I'm also going to rub n buff over this frame and probably cover up the picture, even though it is kind of neat.


What do you think, 1 color, 2, leave it alone?! 

September 07, 2012

Kitchen Paint

Being at home all day with a sweet baby really makes you want to redo/ update different things in your home.  Problem is we went down to one income once said sweet baby arrived so we don't have near as much money to do those updates with.  A pretty cheap way to quickly change a room is paint.  

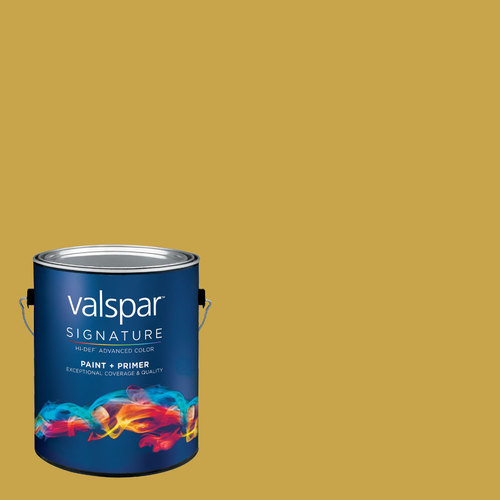
I wanted to add a little color to the nook in our kitchen so off to the hardware store I went.  I wanted a deep mustard yellow.  The first color I picked out was Golden Straw by Valspar.  
Zoomed: Valspar 8 oz. Paint Sample - Golden Straw
I got it up pretty quickly and it was kind of light....I just told myself that it would darken up as it dried.  Well, it didn't and we ended up with a lovely peach.  Ick.  Back to Lowes.  Color #2 was Mustard Yellow, also by Valspar. 


 Note: the color it's showing for the swatch online is nothing what it looked like in the store.  This is color #2 in the below picture.  How is that anything like the swatch?!


After I got the color up I still didn't like it.  Bleh.  It was totally clashing with my painted doors.  Back to Lowes.  Color #3 was Fried Dough, also by Valspar.

Zoomed: allen + roth Colors by Valspar Gallon Interior Semi-Gloss Paint and Primer in One (Color: Fried Dough) 

FINALLY!  


Deep down I think I want to paint the top part too but Hubs says he likes it the way it is.  Between you and me I think he's just saying that because he knows he'll be the one taping off and painting above the cabinets!  Plus...I'm still not sure I'm in love with the color....shhhh.....

September 06, 2012

Vintage Armoire

I promise I'm still alive and kicking over here I've just been taking some time to really enjoy this little cutie...

Look at those rolls!  Ok, enough enough onto furniture...

I bought this vintage armoire over a year ago for $35 and it has been sitting in my garage since then.  It sat in there for so long mainly because I couldn't decide if I should stain or paint it.  


I finally decided to stain it until the hubs and I started the sanding process.  The woodwork on the doors was so intricate that sanding was doing more harm than good.  So now I would be the owner of a painted armoire instead of a stained one.  

First we did some rough sanding on the entire piece and then used spray paint primer.  Then after letting all of that dry I painted the entire thing with 2 coats of an antique white paint.  After letting the paint dry I glazed all the raised up woodwork to help make it stand out more.

To make the glaze I just used some brown paint and added a little bit of water.  I go over how to glaze in this post


 I also bought some new knobs at Hobby Lobby (for 50% off of course).


I'm using this armoire to house all my crafting supplies and our family games!  


ahh...organized fabric.


 To make the armoire look complete I painted the inside a gray blue color that we had left over from our bedroom. 


 This project isn't quite complete yet because I am going to have the hubs install some shelves on the right side to maximize the space.  This is where all the family games with go!

I don't have a good picture of this but I lined the drawers with leftover fabric from the bookshelf makeover I did over a year ago.


July 06, 2012

Wall Collage

In our living room above the couch there is a big blank wall.  It has remained blank since we have moved in.  We just didn't know exactly know what to put there so we just left it alone.  We couldn't decide between a big painting/picture or lots of little ones.  Lame.  

So thanks to Pinterest we were able to see our ideas put into action.  By the way...do you follow me on pinterest? 


Follow Me on Pinterest

I found the frames at Hobby Lobby and they already had the white mattes in them!  Yay!  I waited until they were 50% off and luckily they had exactly six.

I printed out our 8x10 black and white photos from Snapfish because I had found a coupon code so I only had a to pay a few bucks for them.  I went with black and white because I wanted them all to be subtle and I thought with color photos it would be too vibrant.

 
Check out our leather ottoman!  We scored that bad boy on Craigslist.


July 05, 2012

End Table

Yes, I am still alive...it has been soooo hot here lately I have either been at the pool or inside in the AC taking care of my sweet baby!

I found this end table on Craigslist for $30.  I normally would not pay $30 for a piece like this but it is solid wood and that makes it worth it in my book.  


The only downfall about this end table is that the previous owners painted and they did it the right way with primer and all.  This increased my sanding time a little bit. Here it is all sanded.  Look at that gorgeous wood grain!  Who would paint over something like that?!


I applied 2 coats of some stain and then spent a solid 10 minutes picking 20 gnats out of the tacky stain.  Humid weather is not my friend (for staining furniture or my hair).


Then I applied a top coat of polystain.  One of my most favorite products ever.


And finally...here it is in our living room!


Check out this AMAZING lamp!  I found the lamp base at an estate sale for $3!!!  I thought it was just a neat looking lamp until I put a new bulb in it and turned it on...it was like magic!  Check it out!!!

Lamp on...

Base on...


Top on...


I found the linen drum shade at Lamps Plus 


May 30, 2012

Rainbow Cupcakes

Have you ever made rainbow cupcakes?  They just taste happy!  They would also be a perfect rainy day activity to do with kids.

All you do is take your favorite white or yellow cake mix (I do mine from scratch to avoid all those chemicals & preservatives) and divide the batter into bowls.  Then you add your food coloring to each bowl to get your desired color.


When you are adding your colors into your cupcake liners you will want to use a fork and let it drizzle into each cup.  This is so your colors don't mix and they stay in layers.  It's a little time consuming but it's raining outside so you probably have nothing else to do anyways...

Bake like you normally would and top with some fluffy white icing


Make sure you use white liners so you can see all your hard work!


Yummy happiness!